Marble Cake – A Swirl of Chocolate and Vanilla Perfection
There’s something absolutely magical about slicing into a marble cake and revealing those gorgeous, swirled patterns inside! This stunning dessert brings together the best of both worlds – rich chocolate and creamy vanilla dancing together in perfect harmony. Whether you’re hosting an elegant tea party or simply craving something sweet for your afternoon coffee, marble cake delivers that “wow factor” that never fails to impress.
What I love most about marble cake is how it looks so sophisticated and complex, yet it’s surprisingly simple to make at home. You don’t need any fancy equipment or professional baking skills – just a few basic ingredients and a gentle hand with the swirling technique. The result? A cake that’s as Instagram-worthy as it is delicious, with each slice revealing its own unique marbled masterpiece.
Trust me, once you master this recipe, you’ll find yourself making it again and again. It’s become my go-to dessert whenever I want to create something special without spending hours in the kitchen!
Gather Your Simple Ingredients
The beauty of marble cake lies in its simplicity – you probably have most of these ingredients sitting in your pantry right now! Here’s what you’ll need to create this showstopper:
For the base cake:
- 2¾ cups all-purpose flour
- 1¾ cups granulated sugar
- 1 cup unsalted butter, softened
- 4 large eggs, room temperature
- 1 cup whole milk
- 2½ teaspoons baking powder
- 2 teaspoons vanilla extract
- 1 teaspoon salt
For the chocolate swirl:
- ¼ cup unsweetened cocoa powder
- 3 tablespoons hot water
I always recommend using high-quality cocoa powder – it makes such a difference in creating that rich, deep chocolate flavor that contrasts beautifully with the vanilla base. Room temperature ingredients are key here too, as they blend together much more smoothly!
Step-by-Step Instructions for Marble Magic
Preheat and Prep Your Kitchen
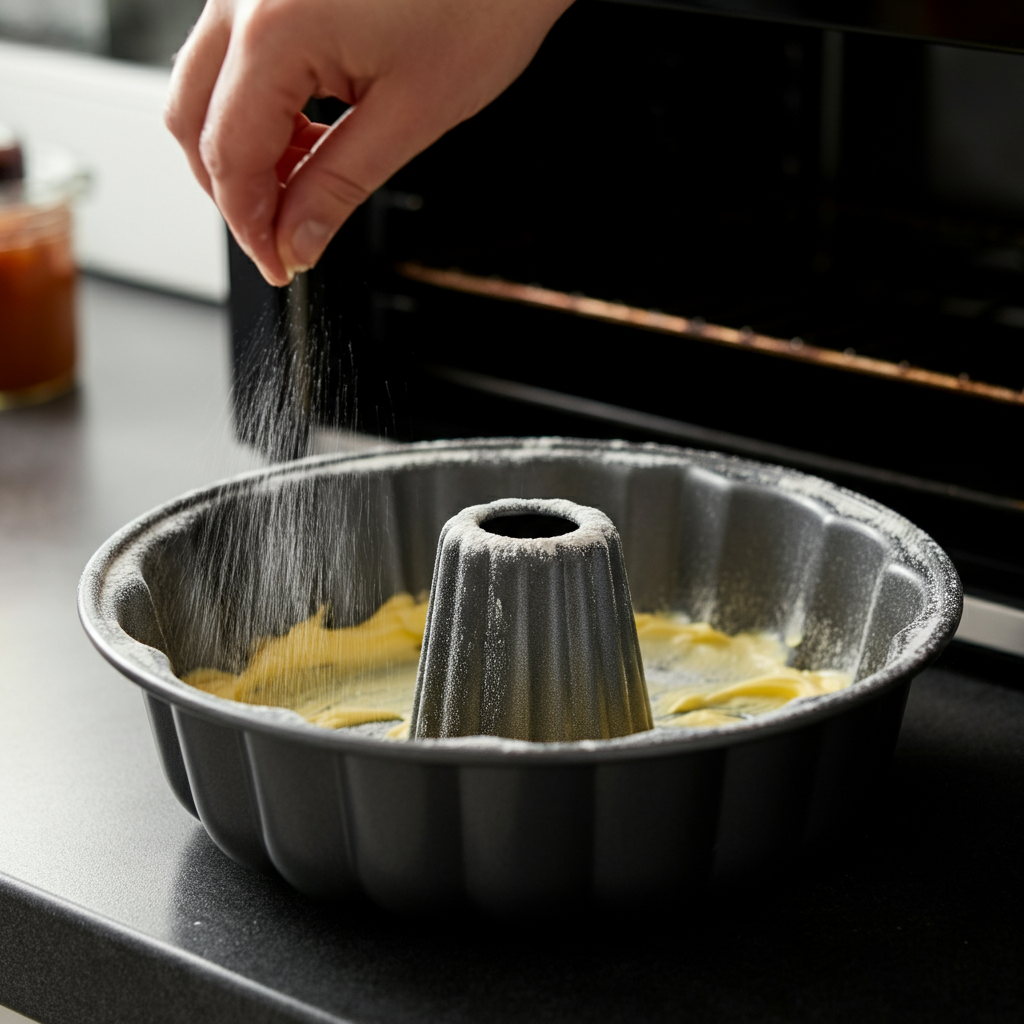
Start by preheating your oven to 350°F (175°C). Generously grease a 10-inch bundt pan or tube pan with butter, then dust it with flour, tapping out any excess. This extra step ensures your beautiful cake will release perfectly from the pan – there’s nothing more heartbreaking than a stuck marble cake!
Create Your Vanilla Base Batter
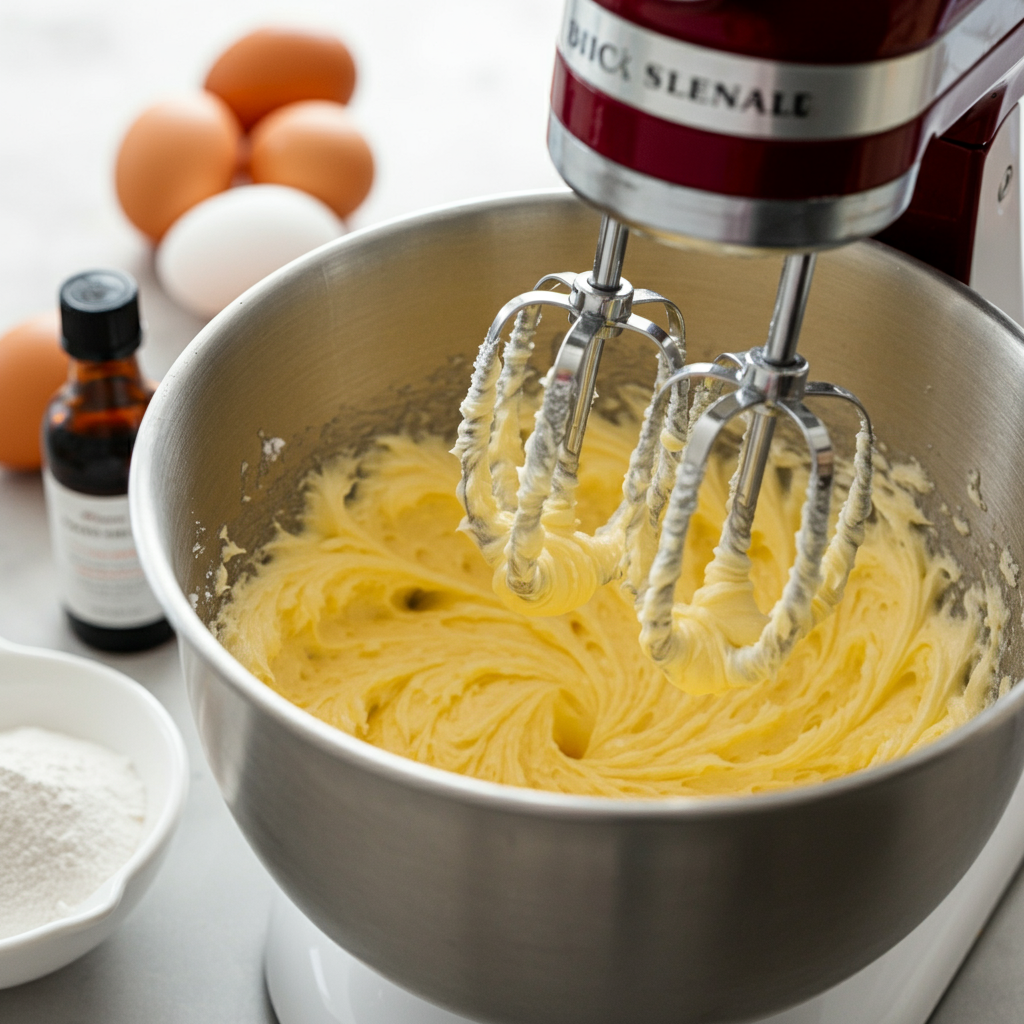
In a large mixing bowl, cream the softened butter and sugar together until light and fluffy – this usually takes about 4-5 minutes with an electric mixer. The mixture should look pale and airy. Add the eggs one at a time, beating well after each addition, then mix in that gorgeous vanilla extract.
In a separate bowl, whisk together the flour, baking powder, and salt. Now comes the gentle part – alternate adding the dry ingredients and milk to your butter mixture, beginning and ending with the flour mixture. Mix just until combined – overmixing can make your cake tough!
Divide and Create the Chocolate Magic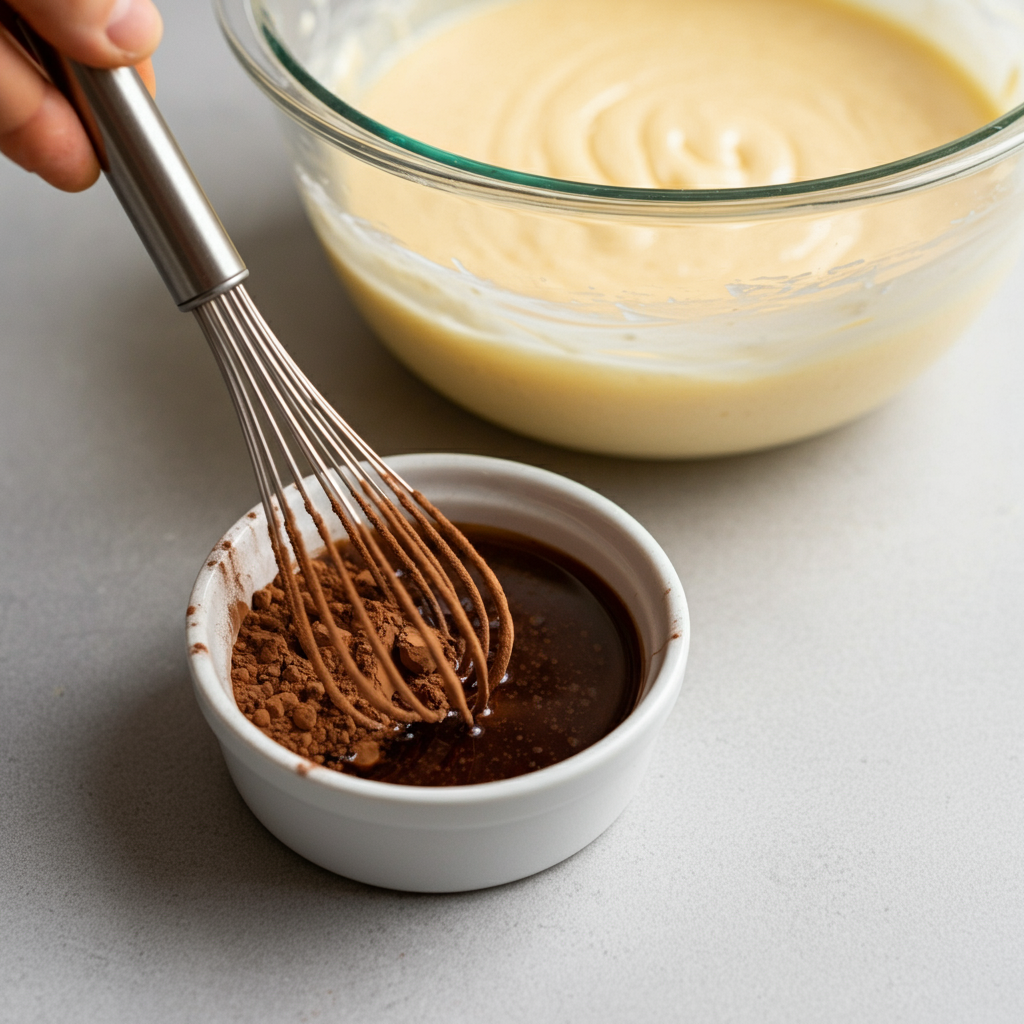
Here’s where the fun begins! Transfer about one-third of your vanilla batter to a separate bowl. In a small dish, whisk the cocoa powder with hot water until smooth – this little trick prevents lumps and creates a silky chocolate base. Fold this cocoa mixture into your separated batter until you have a rich, chocolate-colored batter.
Master the Marble Technique
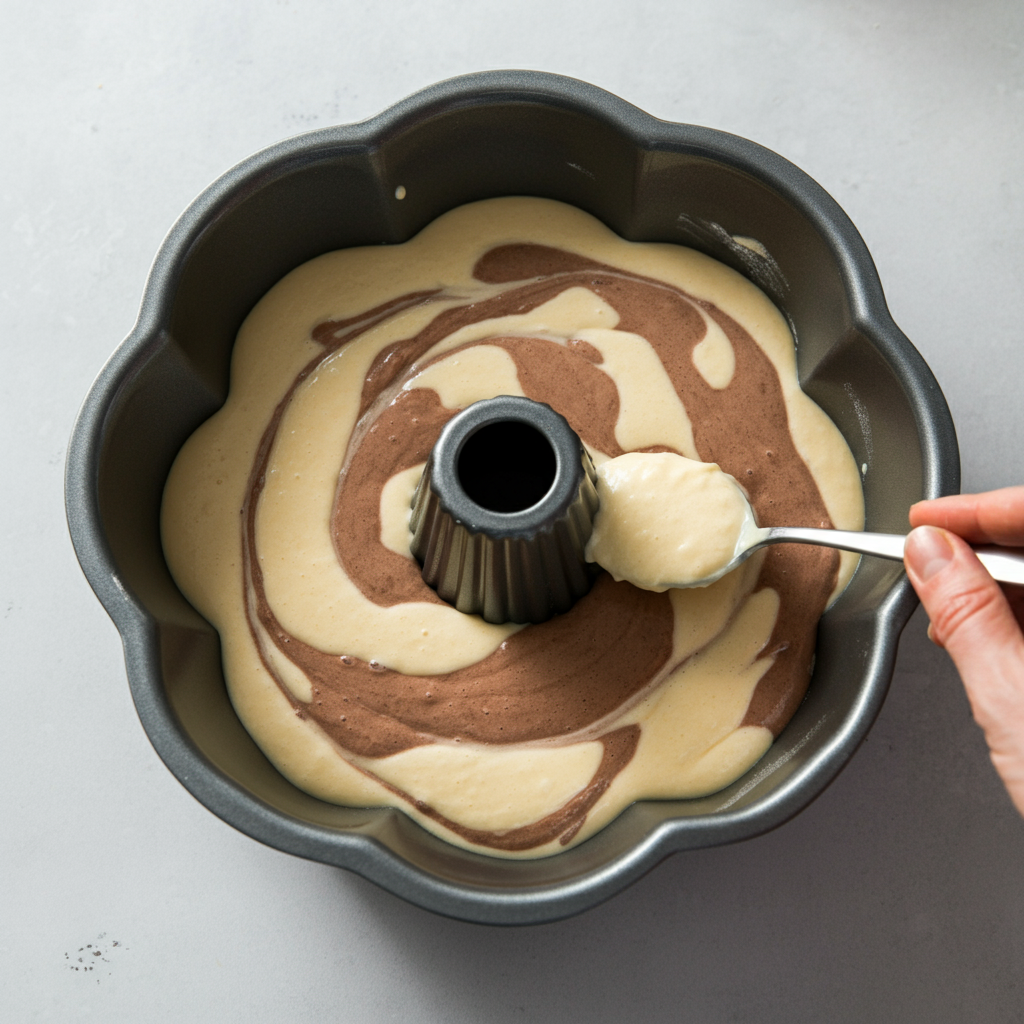
Now for the most exciting part – creating those stunning swirls! Drop alternating spoonfuls of vanilla and chocolate batter into your prepared pan. Don’t worry about being too precise here – random placement actually creates more interesting patterns.
Once all the batter is in the pan, take a butter knife and gently swirl it through the batters in a figure-8 motion. The key word here is “gently” – you want to create beautiful marbled streaks without completely mixing the batters together. About 8-10 swirls should do the trick!
Bake to Golden Perfection
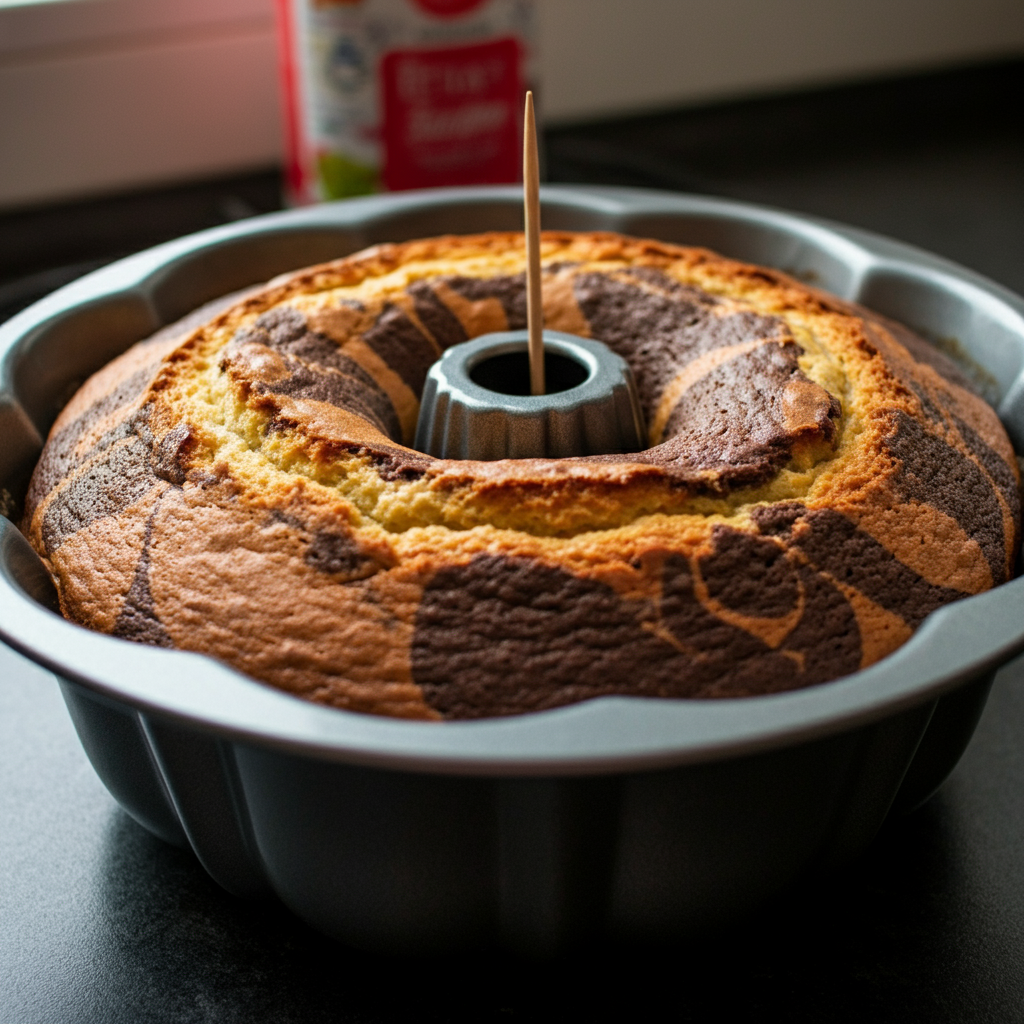
Pop that beauty into your preheated oven and bake for 50-60 minutes, or until a toothpick inserted into the center comes out with just a few moist crumbs clinging to it. The top should be golden brown and spring back lightly when touched.
Cool and Reveal Your Masterpiece
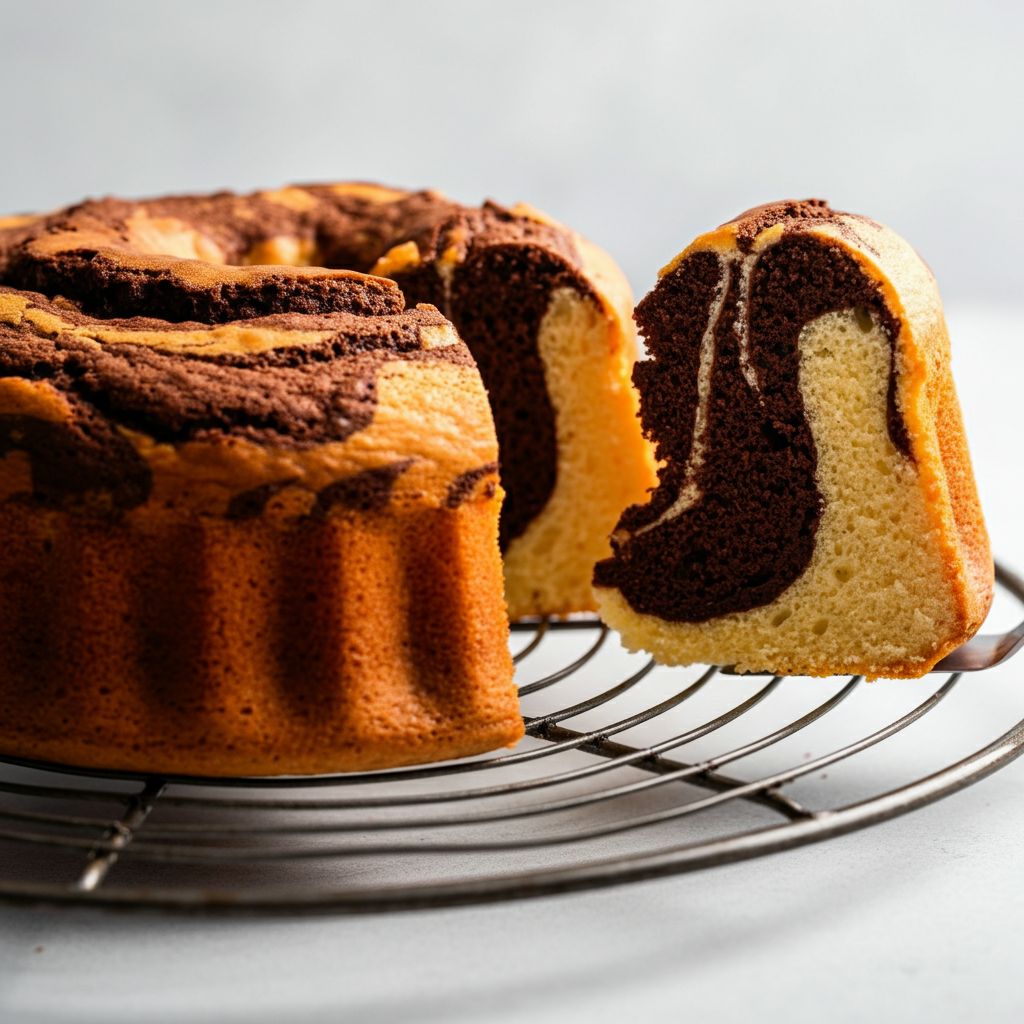
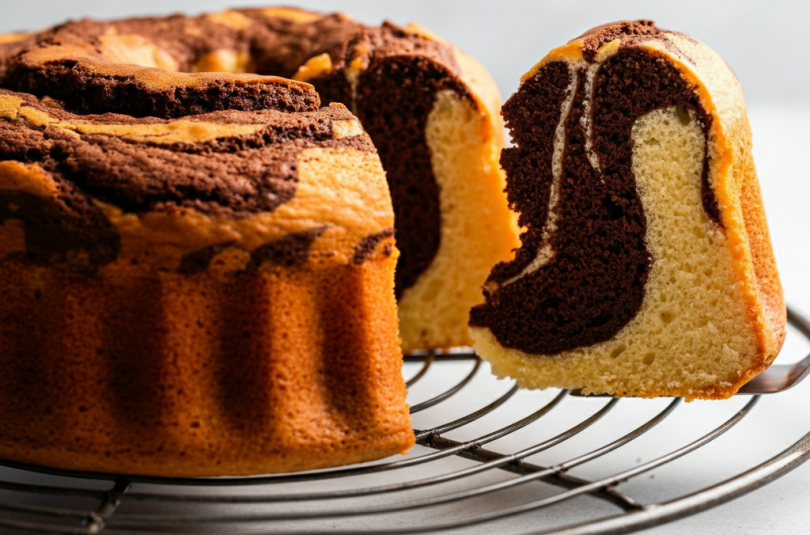
Let the cake cool in the pan for about 15 minutes before turning it out onto a wire rack. This cooling time is crucial – it prevents the cake from breaking apart when you remove it from the pan. Once completely cool, slice into it and admire those gorgeous marble patterns you’ve created!
Pro Tips for Marble Cake Success
After making countless marble cakes over the years, I’ve picked up some tricks that guarantee perfect results every time. First, don’t get too enthusiastic with your swirling – overdoing it will muddy the beautiful contrast between the chocolate and vanilla. You want distinct ribbons of color, not a murky brown mess!
The quality of your cocoa powder really matters here. Dutch-processed cocoa creates a deeper, more sophisticated chocolate flavor that photographs beautifully against the golden vanilla base. If you want to take things up a notch, try adding a tablespoon of espresso powder to your chocolate mixture – it intensifies the chocolate flavor without making the cake taste like coffee.
Room temperature ingredients are your best friend when making marble cake. Cold eggs and milk can cause the batter to curdle or become lumpy, which affects both the texture and appearance of your final cake. I like to take my eggs and milk out of the refrigerator about an hour before I start baking.
For an extra special touch, consider finishing your marble cake with a simple chocolate glaze or a dusting of powdered sugar. A glossy chocolate drizzle not only looks professional but also enhances those gorgeous marbled patterns underneath!
Serving Ideas That Wow
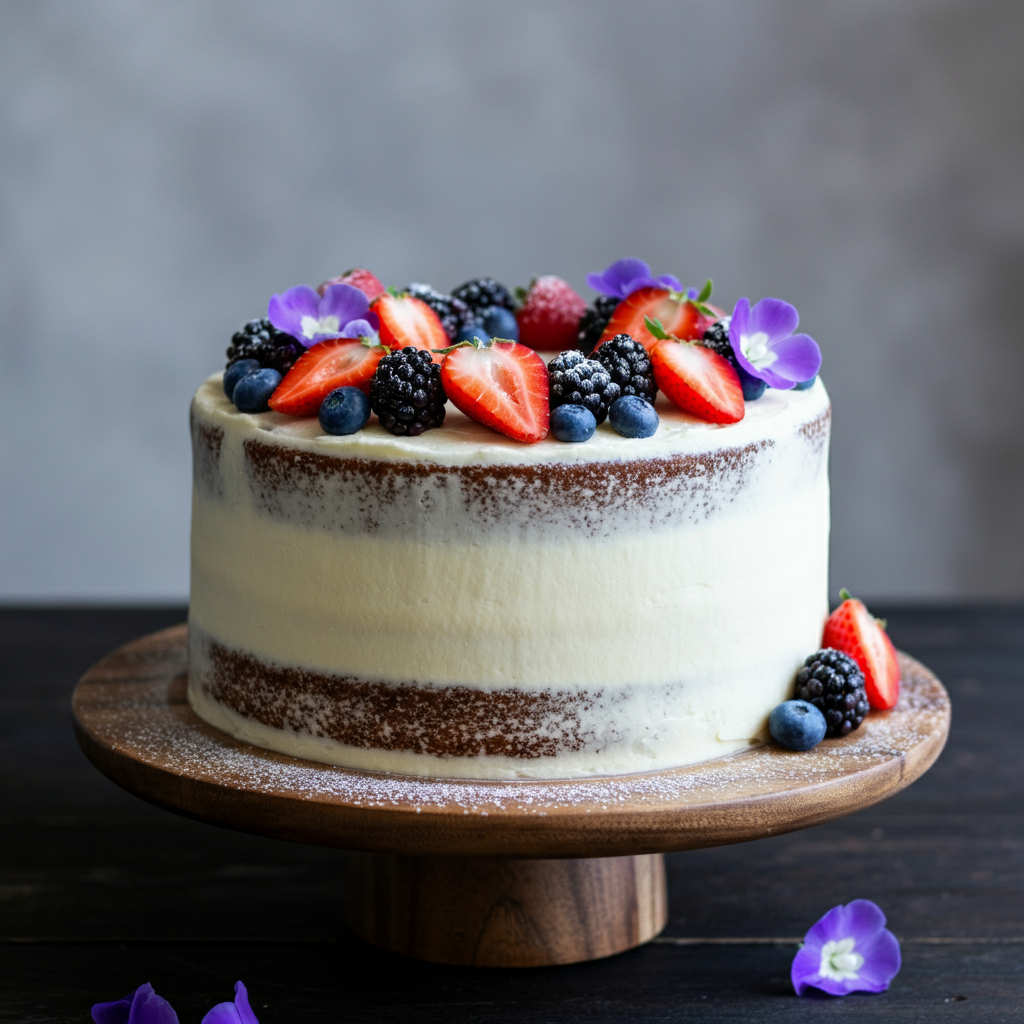
Marble cake is incredibly versatile when it comes to serving options. For an elegant afternoon tea, serve thin slices alongside fresh strawberries and a dollop of lightly sweetened whipped cream. The combination of the rich cake with tart berries is absolutely divine!
During cooler months, try serving warm slices with a scoop of vanilla bean ice cream – the contrast between the warm cake and cold ice cream creates an irresistible dessert experience. I love drizzling a bit of chocolate sauce over the top for extra indulgence.
For casual gatherings, marble cake pairs beautifully with a simple cup of coffee or black tea. The cake’s not-too-sweet flavor profile makes it perfect for any time of day. You can even toast leftover slices for breakfast – trust me on this one!
If you’re feeling creative, use marble cake as the base for a stunning trifle. Layer cubes of cake with chocolate pudding, vanilla custard, and fresh berries for a dessert that’s sure to impress your guests.
Create Your Own Marble Masterpiece
There’s something truly satisfying about creating a marble cake from scratch – watching those simple ingredients transform into something so beautiful and delicious never gets old. The best part? No two marble cakes ever look exactly the same, so each one you make will be a unique work of edible art.
Don’t be afraid to experiment with different flavor combinations once you’ve mastered the basic technique. Lemon and vanilla, strawberry and vanilla, or even orange and chocolate all create stunning results using the same fundamental method.
So grab your apron, preheat that oven, and get ready to create some marble magic in your kitchen. Your family and friends are going to be absolutely amazed when you slice into that gorgeous cake and reveal those perfect swirls inside!