I’ll never forget the first time I made protein truffles. I was desperately craving something chocolatey after a workout, but every store-bought protein ball I’d tried tasted like cardboard with a side of artificial sweetener. That’s when I decided to experiment in my kitchen—and let me tell you, these healthy chocolate protein truffles were a game-changer!
These little gems pack all the rich, fudgy satisfaction of traditional chocolate truffles while sneaking in a powerful dose of protein and wholesome ingredients. The best part? They take just 15 minutes to whip up, and you probably have most of the ingredients sitting in your pantry right now.
Whether you need a post-workout treat, an afternoon energy boost, or a guilt-free dessert that won’t derail your healthy eating goals, these protein truffles deliver on every front. Get ready to discover your new favorite way to satisfy chocolate cravings while nourishing your body!
Why Protein Truffles Are Your New Best Friend
These aren’t just another health food trend—they’re genuinely delicious treats that happen to be packed with nutrients. Unlike traditional truffles that send your blood sugar on a roller coaster ride, these protein-packed versions provide sustained energy and keep you satisfied for hours.
The magic lies in the perfect balance of protein powder, healthy fats from nut butter, and just enough natural sweetness to make your taste buds dance. Each bite delivers that rich, chocolatey indulgence you’re craving while supporting your fitness goals and keeping hunger at bay.
Plus, they’re incredibly customizable! Once you master the basic technique, you can experiment with different flavors, coatings, and mix-ins to create your own signature varieties.
Essential Base Ingredients for Perfect Protein Truffles
The foundation of amazing protein truffles starts with quality ingredients that work in harmony:
Protein powder forms the nutritional backbone of these truffles. Chocolate protein powder creates the most decadent flavor, but vanilla works beautifully too and lets you control the chocolate intensity with cocoa powder. I typically use about 1 cup (roughly 2-3 scoops) for a batch of 12-15 truffles.
Nut butter is your binding superhero and adds healthy fats that create that perfect truffle texture. Almond butter brings a subtle nuttiness, peanut butter delivers classic comfort food vibes, and cashew butter creates an incredibly smooth, almost buttery consistency. You’ll need about ½ cup for the ideal texture.
Natural sweeteners balance the sometimes chalky taste of protein powder without spiking blood sugar. Honey creates chewy truffles with floral notes, maple syrup adds depth and pairs beautifully with chocolate, while pitted dates (about 6-8 Medjool dates) create incredibly fudgy, naturally sweet truffles when processed into a paste.
Unsweetened cocoa powder intensifies that chocolate flavor and adds antioxidant power. Even if you’re using chocolate protein powder, an extra tablespoon or two of cocoa takes these truffles from good to absolutely irresistible.
Building the Perfect Texture and Structure
The secret to truffles that hold together beautifully lies in your structural ingredients:
Oats or almond flour provide the binding power that keeps your truffles from falling apart. Old-fashioned rolled oats ground into flour create a heartier texture and add fiber, while almond flour keeps things grain-free and creates silky-smooth truffles. Start with ¼ cup and adjust as needed.
Milk of choice is your consistency control. Whether you prefer dairy milk, almond milk, oat milk, or coconut milk, adding just a tablespoon or two helps bind everything together. The key is adding it gradually—you want a dough-like consistency that holds together when squeezed but isn’t wet or sticky.
Flavor enhancers make all the difference between bland protein balls and crave-worthy truffles. A pinch of sea salt awakens all the other flavors, while pure vanilla extract adds warmth and complexity. These small additions transform your truffles from gym food to gourmet treats.
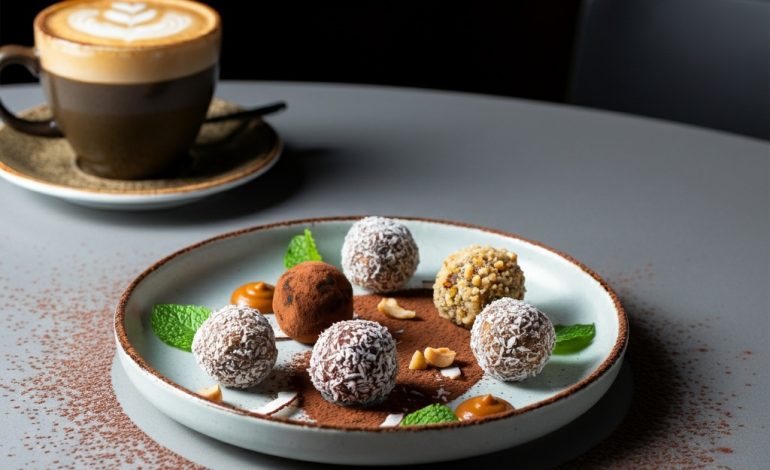
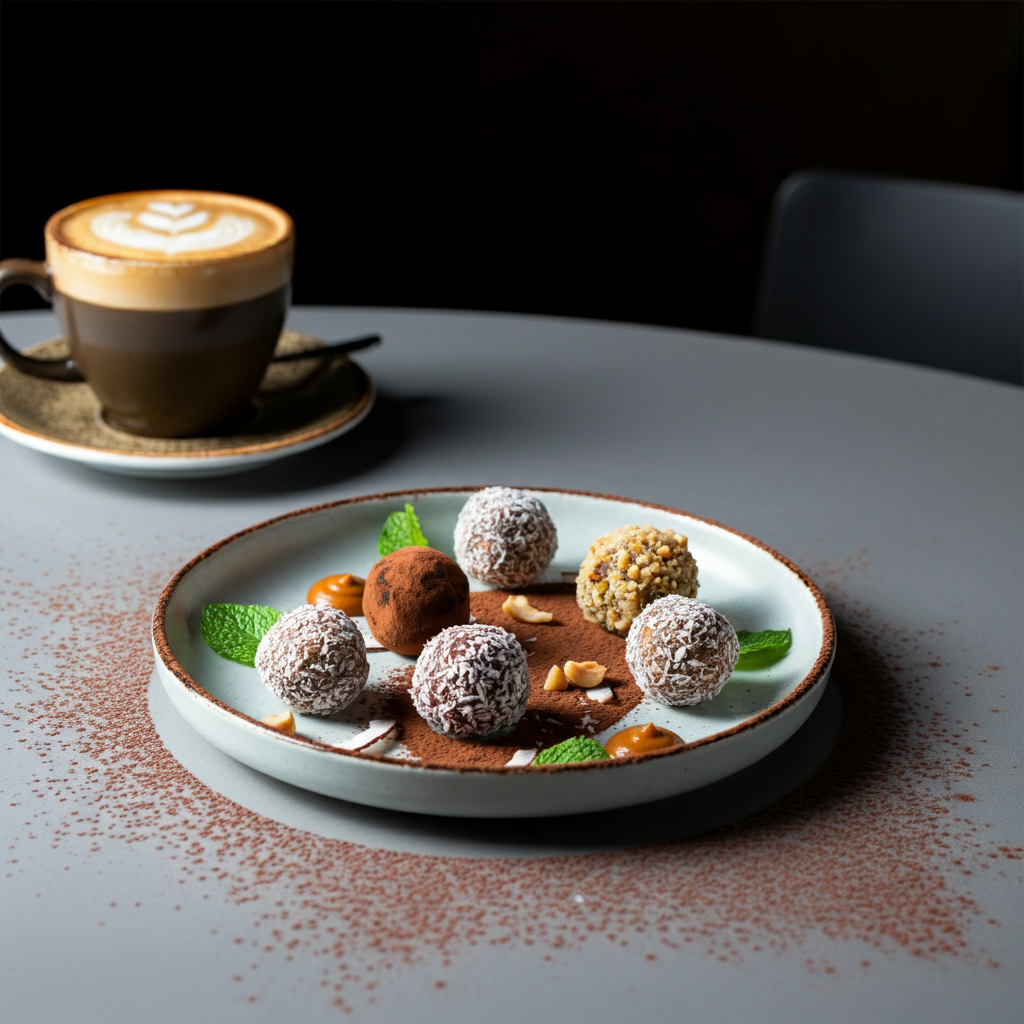
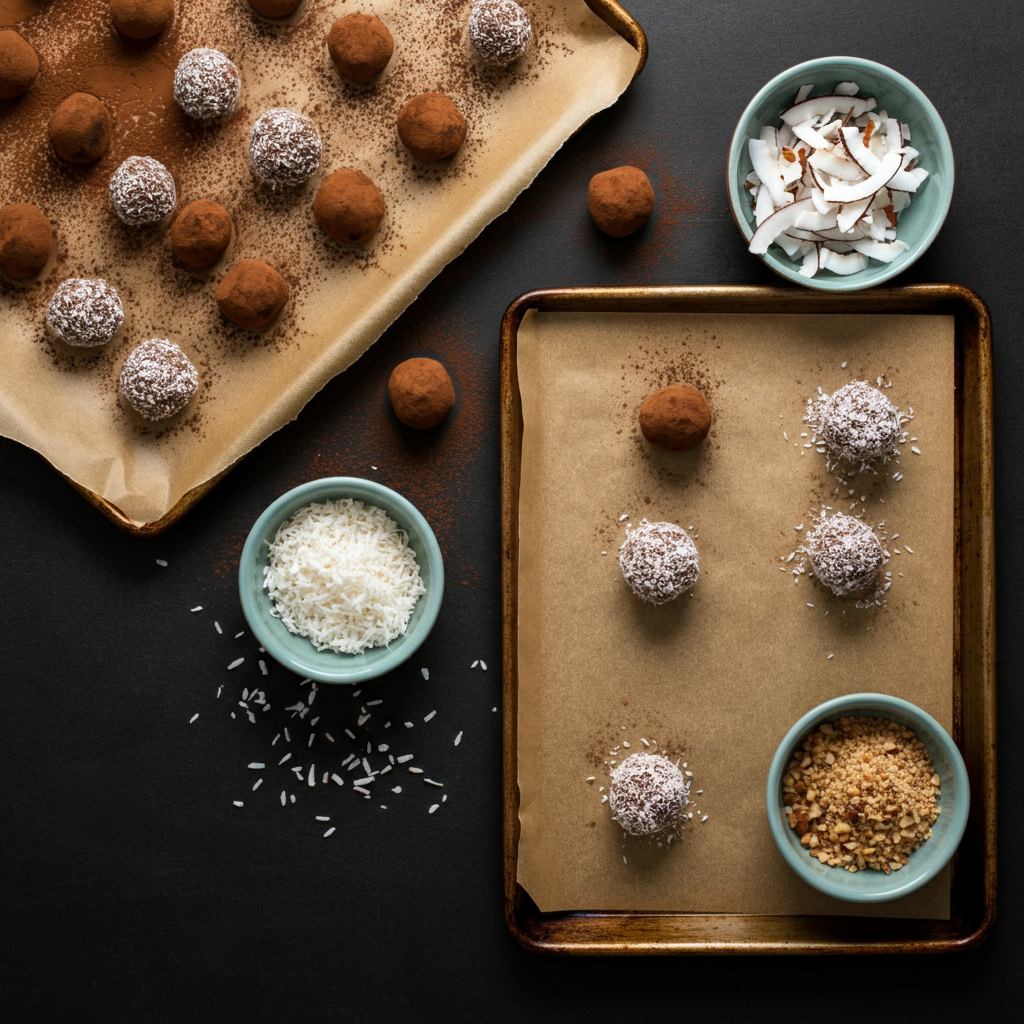
Creative Coating and Rolling Options
This is where your truffles transform from simple energy balls into elegant, bakery-worthy treats:
Classic cocoa powder coating never goes out of style. Roll your finished truffles in unsweetened cocoa for that traditional truffle appearance and an extra hit of chocolate flavor.
Shredded coconut adds tropical flair and beautiful texture contrast. Toasted coconut takes this coating to the next level with nutty, caramelized notes that pair magnificently with chocolate.
Crushed nuts create gourmet appeal and satisfying crunch. Try chopped almonds, pecans, or pistachios for sophisticated flavor combinations that make these truffles feel extra special.
Dark chocolate drizzle or dip elevates your truffles to dessert status. Melt high-quality dark chocolate with a tiny bit of coconut oil for a glossy finish that hardens into a perfect shell.
Step-by-Step Truffle-Making Magic
Creating Your Base Mixture
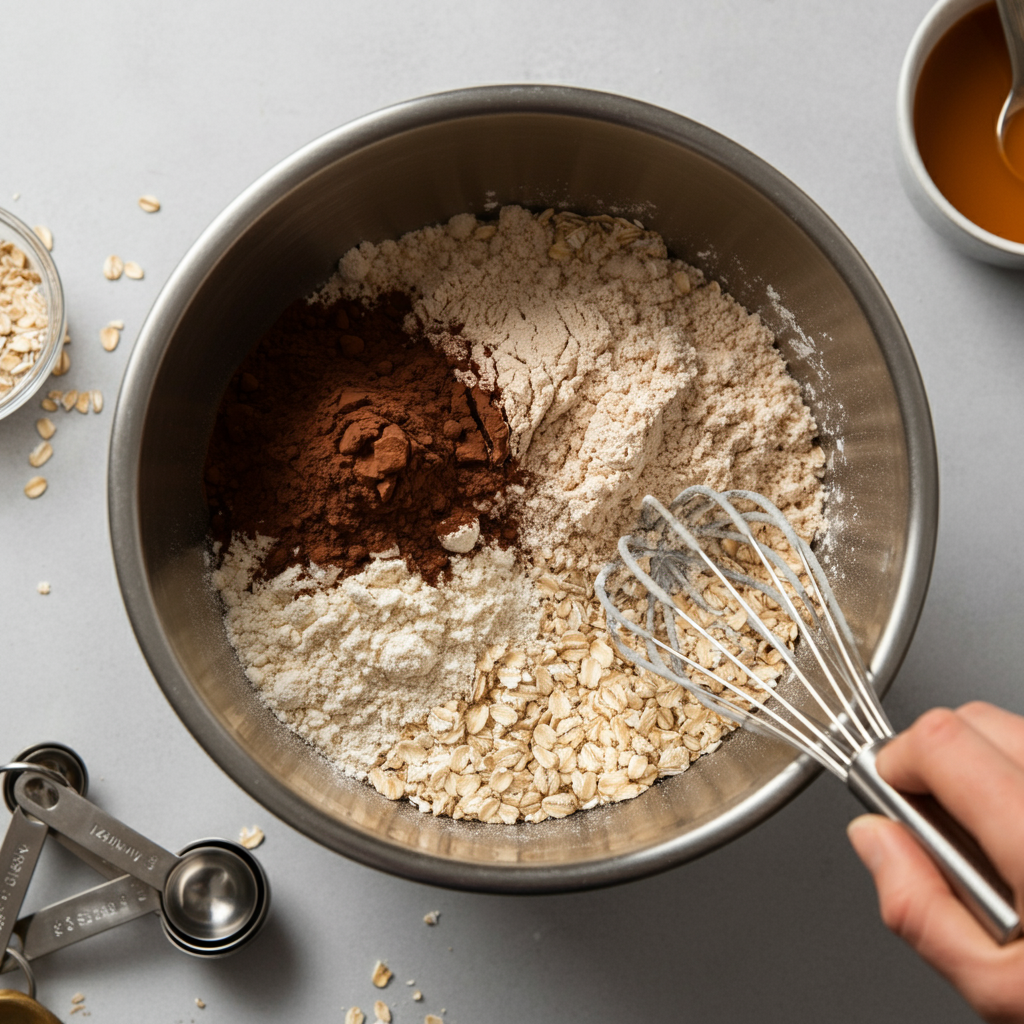
Start by combining your dry ingredients in a large mixing bowl. Whisk together the protein powder, cocoa powder, and oats or almond flour until evenly distributed. This prevents any clumps and ensures every truffle has consistent flavor and texture.
The aroma that fills your kitchen during this step always reminds me why I fell in love with these truffles—it’s like opening a box of expensive chocolates!
Bringing It All Together
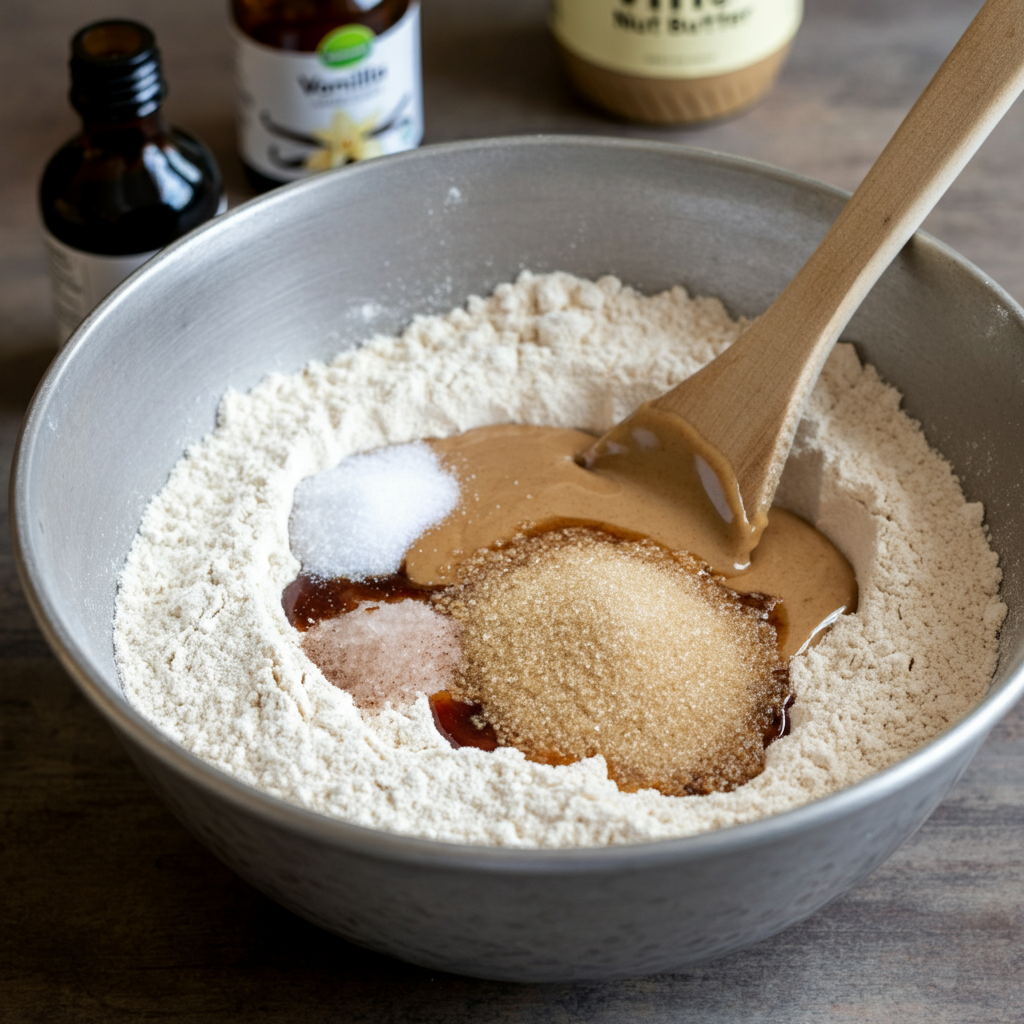
Create a well in your dry ingredients and add the nut butter, sweetener, vanilla extract, and salt. Using a sturdy wooden spoon or your hands, begin mixing everything together. The mixture will look crumbly at first, but don’t panic—this is normal!
Add your milk one tablespoon at a time, mixing thoroughly between additions. You’re looking for a texture that holds together when squeezed but isn’t wet or sticky. Think cookie dough rather than cake batter.
The Art of Rolling

Here’s where the fun really begins! Using clean hands or a small cookie scoop, portion the mixture into bite-sized amounts. Roll each portion between your palms to create smooth, round truffles. If the mixture feels too sticky, lightly dampen your hands with water.
Don’t worry about making them perfectly uniform—the slight variations actually make them look more artisanal and appealing.
Coating for the Perfect Finish
Roll your freshly formed truffles in your chosen coating while they’re still slightly tacky. This helps the coating stick better and creates that beautiful, professional appearance.
For chocolate drizzle or dipping, place your coated truffles on a parchment-lined tray first, then drizzle with melted chocolate or dip them halfway for an elegant look.
The Essential Chilling Step
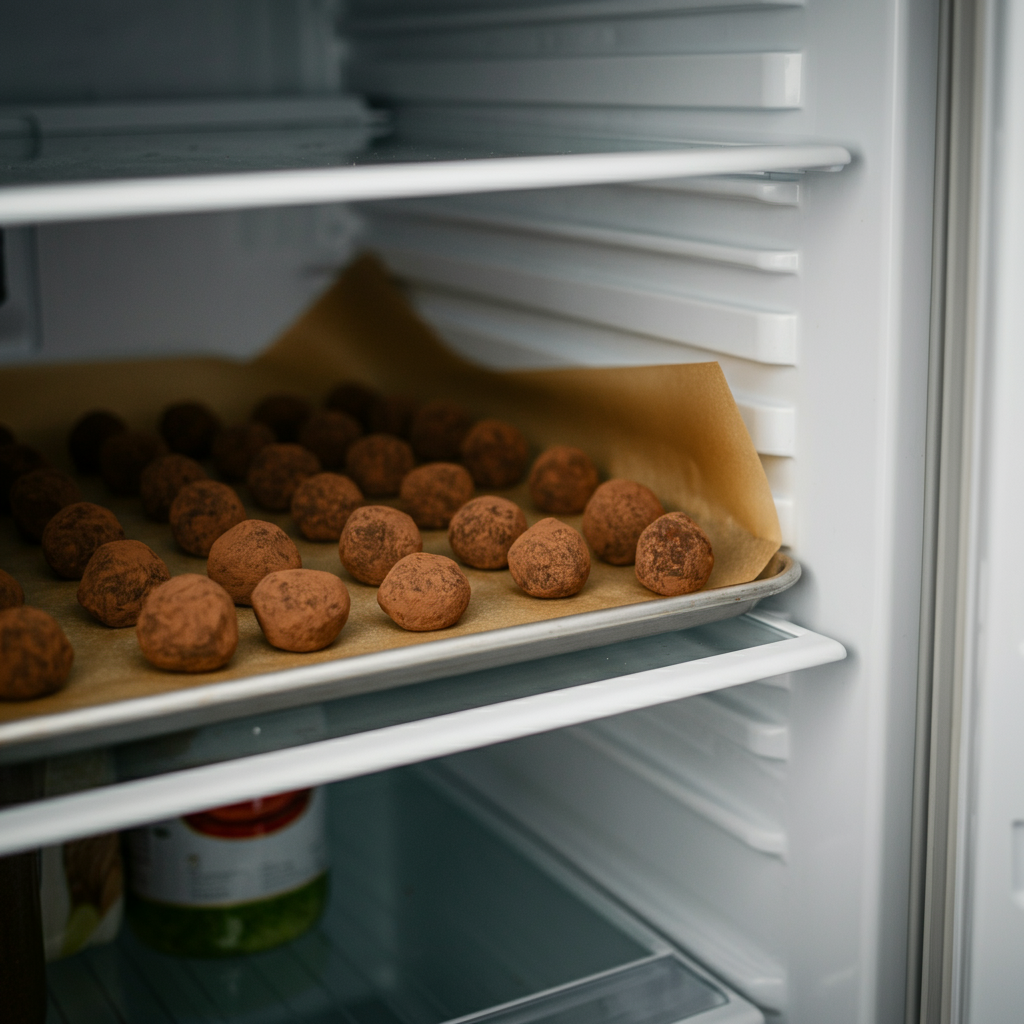
Transfer your completed truffles to the refrigerator for at least 30 minutes. This firming step is crucial—it transforms them from soft energy balls into proper truffles with the perfect bite and texture.
I know waiting is the hardest part, but trust me, chilled truffles taste infinitely better and hold their shape beautifully.
Storage Secrets for Long-Lasting Freshness
These protein truffles are surprisingly versatile when it comes to storage, making them perfect for meal prep and on-the-go snacking.
Refrigerator storage keeps your truffles fresh for up to one week when stored in an airtight container. Layer them between parchment paper to prevent sticking, and they’ll maintain their perfect texture and flavor.
Freezer storage extends their life to two months! Frozen truffles are actually delicious eaten straight from the freezer—they have an almost ice cream-like texture that’s incredibly satisfying on hot days.
For grab-and-go convenience, portion them into small containers or wrap individually in parchment paper. They thaw quickly at room temperature if you prefer them softer.
Troubleshooting Common Truffle Challenges
Sometimes truffle-making doesn’t go perfectly the first time, and that’s completely normal! Here are solutions to the most common issues:
If your mixture is too dry and won’t hold together, add milk one teaspoon at a time until it reaches the right consistency. Different protein powders absorb liquid differently, so adjustments are often necessary.
If your truffles are too soft and won’t hold their shape, add more oats or almond flour gradually until the mixture firms up. You can also chill the mixture for 15 minutes before rolling to make it easier to handle.
If the flavor seems flat, don’t forget that pinch of salt! It’s amazing how much difference this tiny addition makes in bringing out all the chocolate and nutty flavors.
Your Healthy Indulgence Adventure Starts Now
Making protein truffles at home opens up a world of guilt-free indulgence that store-bought versions simply can’t match. You control every ingredient, customize every flavor, and create treats that actually nourish your body while satisfying your sweet tooth.
The next time you’re hit with chocolate cravings or need a wholesome energy boost, remember this recipe. With just a few minutes of mixing and rolling, you can have a week’s worth of delicious, protein-packed treats ready and waiting in your fridge.
So gather your ingredients, roll up your sleeves, and prepare to discover just how satisfying healthy can taste. Your taste buds—and your body—will thank you for every perfectly indulgent bite!